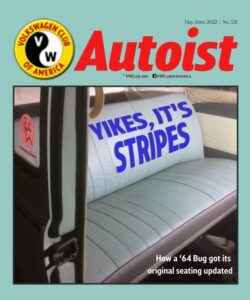
 How a Bahama Blue Bug’s interior returned to its original harmonizing hue
By Cliff Leppke
VW’s advertising made the air-cooled Beetle’s anachronistic body shape a virtue. In an era where Detroit annually rolled out new wrappers on its chassis, VWs, in contrast, looked startlingly the same year to year. As such, buying an evergreen Bug supposedly assured you a ready supply of parts and an opportunity to drop out of the rat race.
The latter notion hit a nerve as many Americans were concerned about planned or forced obsolescence. The issue wasn’t shoddy products, which is how some experts interpret these words. Instead, designer Brook Stevens, likely the foremost planned-obsolescence apologist, claimed the goal was planned product improvements, often stylistic, which served as inducements to buy new items before the old ones wore out. This design philosophy lured you into trading in your formerly fashionable car because it appeared dated. It was about keeping up with the Joneses.
 Stevens argued planned obsolescence stimulated demand, grew the economy and benefited everyone, as your not-very-old chariot found a second life. A less affluent motorist acquired your heavily depreciated car as bargain transportation. This process kept Stevens, manufacturers and others employed. VW’s amazing success in the USA, in contrast, proved, so it seemed, that Americans wanted sane design, not Detroit’s dizzy fashion-forward fetishes, such as cantilevered tailfins.
Or did it? Look closely at the 1964 model-year Bug. You’ll see evidence that VW, contrary to the ads, shifted aesthetics, yes fashion, from year to year. For example, VW color-keyed/coded exterior and interiors in harmonizing hues. Sometimes these combos were year specific — more on this complex twist later. Fender welting, for example, matched the body color. And that’s just the start. A Bahama Blue sedan (fresh color for ’64 and used through 1966) came with color-keyed wheels. The discs or wheel centers were Black (L41) surrounded by Blue/White rims (L289). A Black Beetle, in contrast, wore Pearl White (L87) rims with Black centers. Bahama Blue came with Alpine Blue running board mats, whereas a Sea Blue car wore Satin Blue mats.
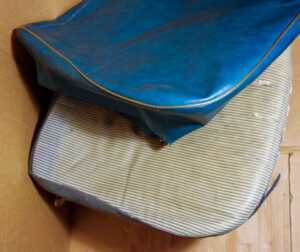
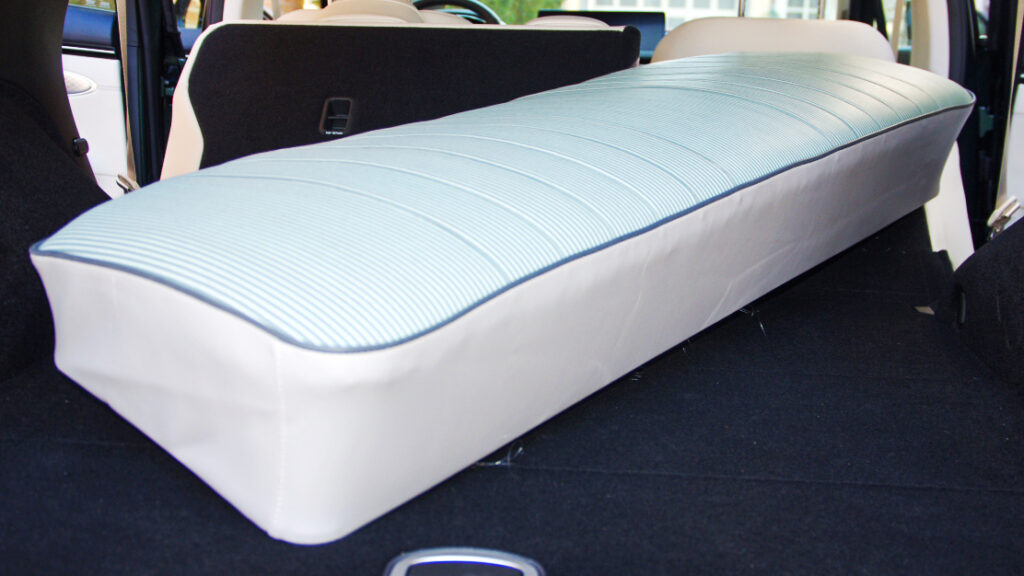
Inside, a 1964 Bahama Blue Bug sported bright, easy-to-clean, vinyl upholstery, a (74) Blue Cord pattern with subtle basket-weave emboss and indented grooves (not the same basket-weave that arrived for 1966). Those items updated the car’s image. This striped look lasted one model year. Several more cord colors — 70 Grey, 73 Red and 71 Brown — complemented exterior shades. Those who shopped for Black Bugs could, according to VW’s color booklet, select gray or red-cord seats.
Door cards and rear quarter panel covers, likewise, varied. The ’64 Bahama Blue car donned something close to Light Blue centers flanked by Dark Blue outer bits. A Sea Blue VW wore a different combo, a two-tone gray scheme. Some sources say the 1965 model-year cars featured revised card-color schemes. A blue 1965 Beetle I dismantled, however, shared my 1964’s hues.
For 1965, VW switched to mesh-patterned vinyl seats. It also altered how the contrasting side panels fit. For ’64, the VW covered the entire top surface of seat bottoms and seat backs with a corded pattern surrounded by welt piping. For ’65, the mesh material truncated below the seat-back’s upper edge. Here, VW attached and wrapped solid-color vinyl over the seat’s top and down the back. Welting no longer ran transversely along the seat’s top.
Then for 1966, VW changed the look, again. It chose a simpler monochromatic interior scheme where, say, a white car came with red interior trim and a Bahama Blue was all black — two-tones were out. VW, furthermore, introduced a larger basket-weave vinyl or leatherette seating surfaces, a VW staple, as this leatherette style was a “mandatory” option on most VW sedans until at least 1973. Leatherette upholstery and often white-wall tires, which upped the car’s modest price, were outboarded (extra cost options). This let VW advertise a low base price.
Back (seat) to the future
One functional seating change, which many don’t understand, was the 1965 Beetle’s folding rear seat. While it’s true you could fold the aft seat’s back on earlier models, the ’65 Beetle’s rear seat-back’s redesign allowed it to fold flatter. And its back side sported durable material meant to support weighty cargo. And you could strap this section down, forming a sturdy platform. This was useful but, alas, access through the car’s doors remained awkward.
VW’s interior and exterior color trends stabilized toward the early 1970s. It simplified the Beetle’s appearance — black running board mats, regardless of exterior color and eventually Chrome-colored wheels (L91) or what many call Argent Silver, again regardless of exterior color.
Under the covers
The subheading sounds like a romance novel title. And like those mass-produced fictions, you can find intriguing things inside an unrestored vintage VW. For instance, I found my 1964 Bahama Blue VW in Little Rock, Arkansas, nearly 40 years ago. I bought it from its first owner. I saw it on a downtown side street with a for-sale sign in its window. I knew from first glance it was a 1964 Bug — the only year squirted this color shade that bore the late-1950s small side windows. Yes, dear reader, there was a time when I played car spotter, demonstrating an uncanny ability to peg car models and model years — an unexpected planned obsolescence fetish.
This lonely VW got my attention because the exterior paint was mostly original. Plus, things like the deteriorating color-keyed running board mats, with wide stainless steel trim caught my eyes — as I never saw a Wisconsin Beetle sporting
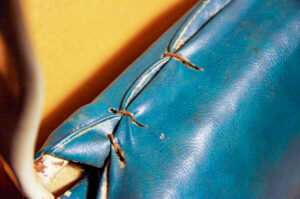
these pieces due to rust. All wore newer black running boards with thin side moldings.
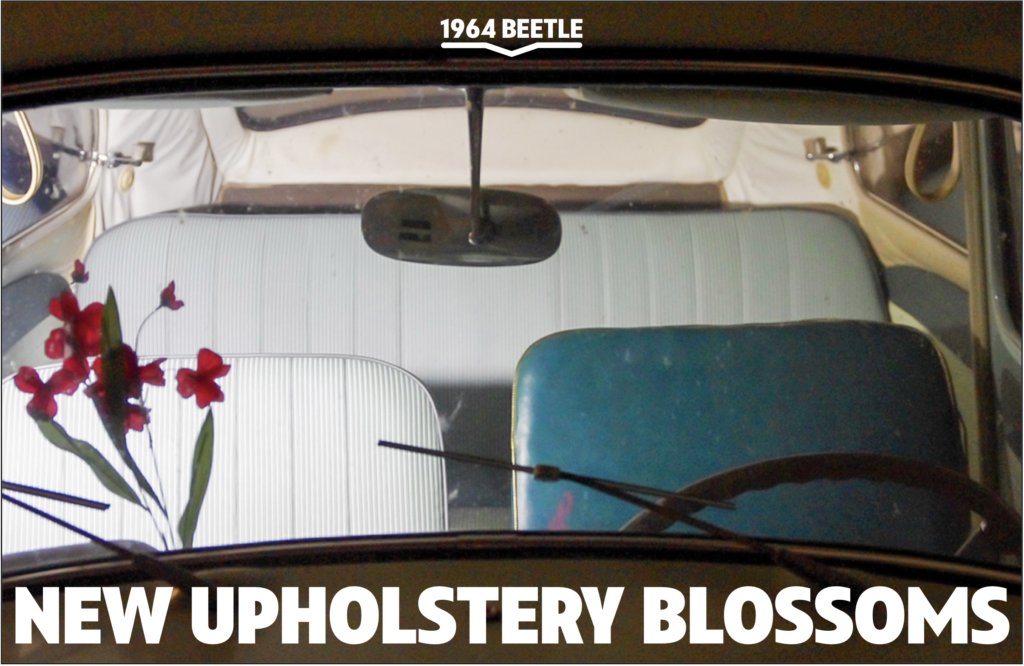
Inside my Bug, a “fasten seat belt” sticker modified the painted dashboard. The door cards and rear quarter covers were two-tone, light green centers (VW called these Blue) with dark gray upper and lower sides (VW called this Dark Blue). The front seats were re-covered with blue-green vinyl surrounded by sparkling chrome-like welt piping — tres chic! Hog rings, round, nail-like, C-shaped metal fasteners, attached these around the seat frames.
VW didn’t use hog rings. Instead, it employed barbs or cleats, which perforated the seat upholstery. The original covers’ lower regions were neatly finished with wires sewn into a loop formed by rolling the fabric around them. After one worked these covers over the seat padding, springs and frames, you pulled the wires tightly, which wrapped the covers
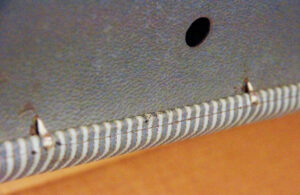
around the frame. Then, you attached this, pulling it over the barbs, poking through the looped fabric where the wire reinforced the material.
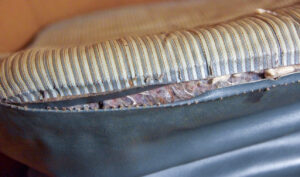
Thus, I knew the front seats weren’t factory items, but the soiled rear seat with its ripped and floppy cord pattern cover caught my fancy. I’d never seen a VW with such loud “Yikes it’s Stripes” upholstery. And as I learned, nearly no-one knew about this style. One reason, according to Road and Track’s survey of Beetle owners, was “a rash of bad upholstery stitching in 1964.” Simply put, the 1964’s problematic seating material exploded. The set cover stitching unraveled alarmingly quickly and the vinyl seating surfaces split. Side panel material, however, was robust. And the contrasting plastic welting usually lasted, although not attached to its mates.
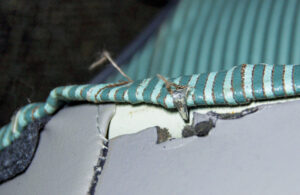
I left my Beetle well enough alone, fixing the worn floppy front suspension, correcting brake repair mistakes and solving cylinder 4’s (not 3!) leaky sparkplug hole. I did, however, repaint the wheels, which someone had recoated in bright white. I used the spare-tire’s untouched wheel as my guide (found under the front lid’s cover). My local paint shop’s staff knew the color codes. They didn’t even look them up!
While my car’s ratty looking interior had its own special vibe, I searched car shows and upholstery stores seeking someone who sold cord pattern material suitable for fabricating new seat covers. About four years ago, I connected with Lenny Copp at West Coast Classic Restorations, a VW specialist, and asked whether he could make my car’s seats look their original best. Copp said he had enough of the original German blue-cord pattern for the project but made me promise not to hog-ring his handiwork. He reminded me that his covers, which slide over the seat frame, padding and springs like pillowcases, are sewn to fit like items in a department store’s domestic section. They were, he claimed, “Wolfsburg approved.”
In addition, Lenny, as he’s known, wanted me to hire an auto upholstery expert to tackle the front seat bottoms. He sewed a loop of fabric under these covers. One tacks this loop to the horse hair (coconut, actually) seat padding to prevent the cover from shifting. It also produces a taut, indented fit. My 1972 Squareback’s original seats have the same bottom attachment concept, but VW simply looped a row of threads over the seat cover and around the padding below it. Yes, you can see the threads, no buttons or material hides them — apparently VW needed to shave a few pfennigs.
The next part went aesthetically askew. I asked for the blue-cord pattern with dark piping meant to match the darkest cord stripe with side panels matching that dark hue. That’s the original look. And this shade matches the dark door card stripes. Instead, I received light-gray side panels. Lenny used this hue for another 1964 Bahama Blue car whose owner requested it. This person wanted light gray because he used reproduction two-tone gray door and quarter panel cards meant for a Sea Blue Beetle. The Bahama Blue car’s running board mats, seat covers and door cards haven’t been reproduced — Wolfsburg West, for example, doesn’t offer them. Neither does Mid America Motorworks or TMI, a popular vendor.
Because Lenny charges a mint for his covers — his workmanship is lovely — I didn’t return his seat upholstery kit and request a redo. Instead, I went forward with my car’s interior restoration using Lenny’s “master pieces.”
Before I began my seating redo, I consulted VW’s 1200cc Beetle service manual. One chapter covers re-covering VW seats. I’d later discover VW’s manual depicts at least one corded seat cover but doesn’t show changes VW made to the 1200cc Bug’s seat frames. For example, my ’64 Bug’s front-seat back covers don’t attach via barbs. Instead, you pull the seat covers over the springs, padding and frames and then tuck the reinforced front and back ends of the covers into grooves in the frame’s bottoms. Lenny’s covers fit this perfectly — well, almost perfectly.
Next, I ordered seat padding. I opted for Wolfsburg West’s reproduction hair-type padding, as I wanted that OEM feel and smell. I tried in vain to locate OEM seat wadding or batting. VW covered the horse hair with wadding/batting — usually the sides. This does at least three things: one, it creates softer, smoother seat corners; two, it reduces chafing; and three, the pillowcase-like cover slides more easily over the padding — a boon to anyone doing this task. Neither the Wolfsburg West’s nor Mid America Motorworks’ wadding matched the OEM stuff, which looks like thin felt composed of various fabric bits.
So I bought cotton batting from Jo-Ann Fabrics, which better matched the original material’s thickness. I also bought a mesh-like spring cover material (described as pet screening) meant to prevent the seat springs from gouging the padding. This was thinner than the material sold by Mid-America Motorworks for this purpose. Thin for this purpose is better.
Bodice ripper?
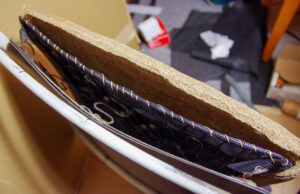
After I assembled this collection of materials or “materiel,” as this was more like fighting a war, I began the process of uncovering my car’s old seats. I either removed hog-ringed covers or pried up barbs, released wires and tugged off the seat covers. Talk about a bodice ripper! This is where the intrigue began as I found remnants of VW’s original seat covers under the re-covers. And that’s not unusual as car upholstery shops often fabricate new covers, add some new padding and then slide them over the old ones. Then they hog-ring them in place.
The best example was the front-right seat bottom, All OEM bits were under the re-cover. This showed a big change from Lenny’s bottom cover — the original corded material ended at the seat bottom’s back edge. There, VW sewed a panel in
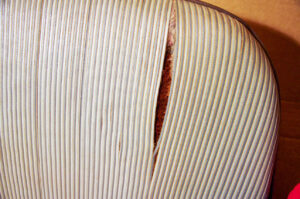
a color matching the front and side panels. The original cover’s bottom was reinforced and tugged tightly around the seat frame. Wires, sewn into all four sides, let you cinch the cover’s open end. Then you attached it via those barbs.
Lenny, however, extended the corded material, wrapping it over the seat bottom’s back and then, because his creation was inches longer, it didn’t align with the seat barbs. Instead, I hog-ringed; his creation to the spring frame a few inches forward from the frame. That’s the same spot the previous upholstery outfit picked. Lenny sewed a nylon tie string into this cover’s side and front panels. This lets you cinch three sides of the cover. I fashioned a metal rod from an old coat hanger, slid it into a slot Lenny provided in order to affix the corded back section to the seat spring assembly.
Another deviation: the original front seat bottom wasn’t tacked to the hair padding. This step, which Lenny and VW’s service manual recommends, wasn’t extant on my car — likely another 1964 change.
 The blues
I ran into an assortment of seat-covering woes: one, the molded hair padding fits ever so tightly over the seat spring assemblies. Nonetheless, sometimes padding corners are squared off rather than rounded. This causes lumps at the seat edges; two, this padding sometimes didn’t fully cover or conform to seat springs or frames. For instance, the front seat back padding doesn’t bow inward and the bottom doesn’t wrap around the spring frame. I ran into the same issue with the rear seat-back padding. It didn’t wrap around the bottom edge. Plus, like the front backs, the padding didn’t fit the contours accurately.
Therefore, I tacked the horse hair padding in place using wax-coated nylon thread. This improved the padding’s fit — a tad less fight with compressing the padding while sliding the new covers over it. A third issue was Lenny’s rear seat back cover — VW attached a hardboard panel to cover the seat’s back. You place its bottom edge over the seat’s barbs later used for the front fabric’s attachment. Lenny’s softer material for this purpose was neatly sewn and had punched holes in it matching the original design. But because this piece was soft, the tension required to pull the rest of the cover over the seat and then onto those barbs ripped it at each attachment spot. I’ll have to fabricate a repair at a later date. Fourth, Lenny created the OEM seat-cover groove by pleating the cord pattern fabric. This, however, creates lumps at the seat cover edges. In addition, this extra thickness makes it very difficult to insert the front seat back covers into their attachment grooves. I had to pry that slot wider, which worked.
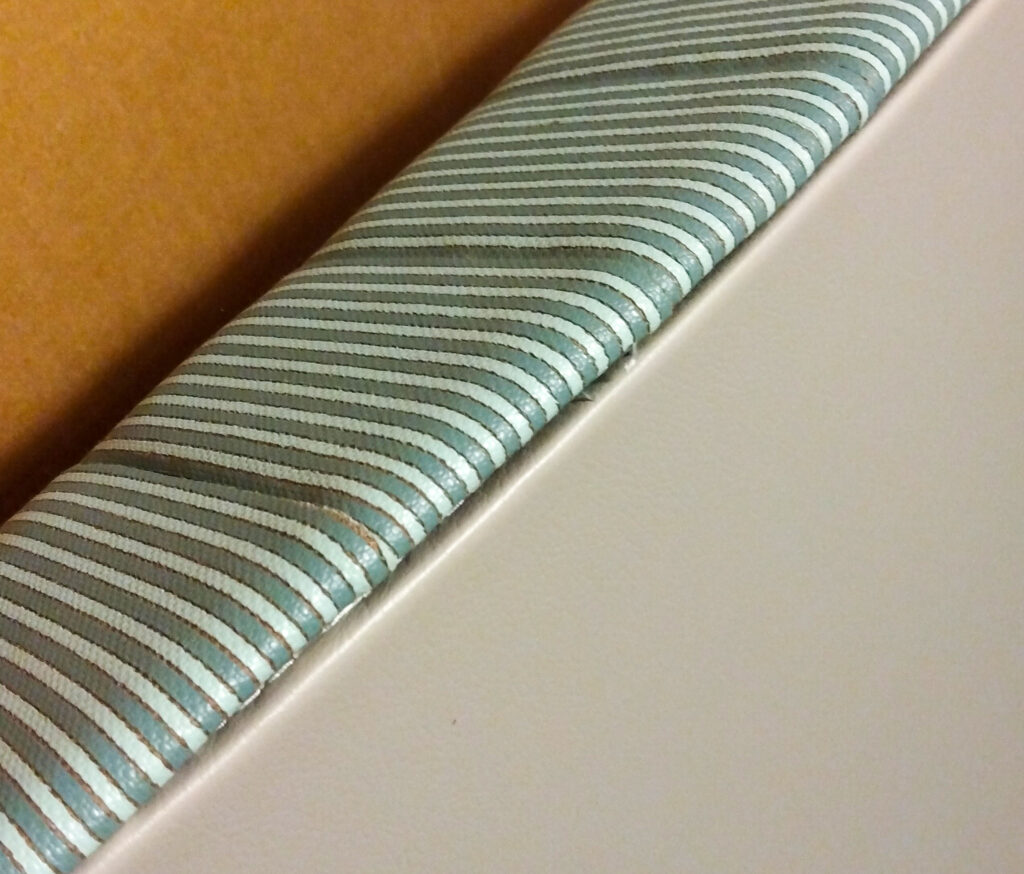
One thing Lenny doesn’t include: rod-like reinforcements you slide into some covers. These thicker wires hold the material taut under and between the barbs. You must repurpose the original rods.
While I think my written words might sound like I’m unhappy with WCCR’s upholstery kit. That’s not true. These covers are nicely made, fabricated to ape the original look. They’re fantastic.
Besides the new material fit issues, I ran into several unhappy bits of this car’s history. While the passenger’s front seat bottom was simply over-covered, the driver’s seat didn’t share that happy fate. Instead, someone removed that OEM upholstery, smashed the barbs flat, put thick padding over the worn original horse hair and then hog-ringed it. Thus, the barbs broke. WW sells new barbs — they’re larger than the originals. You can weld them to the seat frames. And on the seat back, the original hardboard cover-fitted between the seat frame and the spring assembly was missing. You want this cover as it protects the cover and a rear passenger’s knees from unhappy encounters. WW sells a reproduction.
Other issues included bent left front seat spring assemblies. And the bottom edge of the rear seat bottom’s cover tended to bow between the barbs. Blame new softer vinyl for this. Lenny reinforced the bottom cover “wrap” with a flexible nylon string rather than stiffer wire. I improvised. I employed binder clips to hold the fabric taut and then tacked it in place with clear nylon thread. Binder clips proved helpful when fitting the spring cover material in place. Used them to hold it tight while using wax-coated nylon thread to attach this protector to the frame. Some might use hog rings. I didn’t go that route as I wanted Wolfsburg smooth.
I’ve included a few shots of my 1964 Beetle’s new look. The seating surfaces now pop your peepers due to their fashion-forward motif. Judge for yourself. This car’s seats have an authenticity often missing in the usual VW restoration. And now you know how seat fabric design sets the 1964 VW Beetle apart — even if it came apart. ![]()
Cliff Leppke | leppke.cliff@gmail.com
ALSO IN THIS ISSUE:
- QUICK ID.4 SALE FAIL: A new VW EV driveway bound in just three weeks? Not so fast, Mr. Salesman.
- CHICAGO AUTO SHOW: It was a shadow of its former self, and VW’s display was an appropriate fit.
- GOLF R: The new touchscreen interface mars an otherwise stellar package of style and performance.
PLUS OUR REGULAR COLUMNS AND FEATURES:
- Small Talk – VW + Audi at a glance
- Retro Autoist – From the VWCA archives
- The Frontdriver – Richard Van Treuren
- Fix It Safely – George Lambesis
- Classified – . . . ads from members and others
- Parting Shot – Photo feature
- VW Toon-ups – Cartoon feature by Tom Janiszewski
LOGGED-IN MEMBERS CAN SEE THE ENTIRE AUTOIST ISSUE BY CLICKING ON THE “AUTOIST ARCHIVE” OPTION UNDER THE “AUTOIST” TAB.
